Integrations
Bubble Sync Checkout Purchase History
Sync Stripe Checkout data to Bubble.io

You can sync Stripe Checkout data to Bubble.io using PriceWell. This is useful if you need a customer to pay for a certain product before enabling a feature in your app.
This page will walk you through how to sync your Stripe Checkout data to Bubble.io so you have a record of everything a customer has purchased right in your Bubble database.
We’ll go through:
- Setting up the required data types
- Enabling access via the API
- Configuring the PriceWell Bubble integration
Create a new Data Type

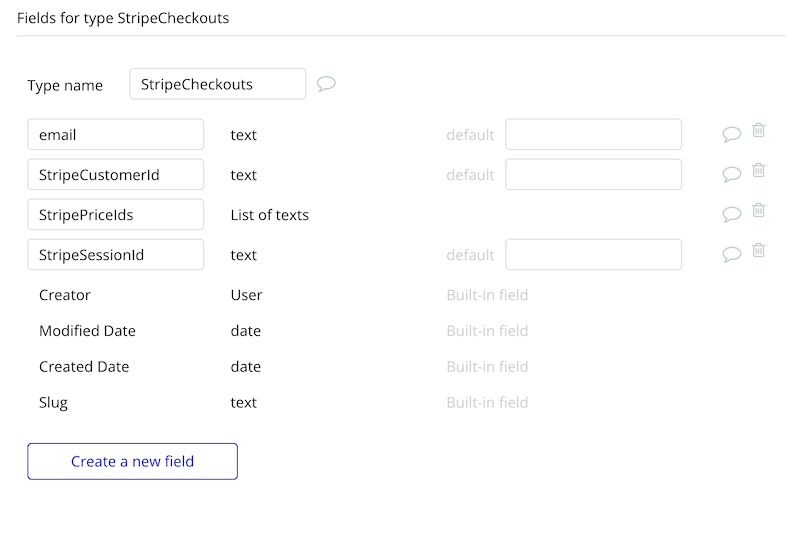
Create a new data type called StripeCheckouts. Give it the following fields:
| Name | Type |
|---|---|
| text | |
| StripeCustomerId | text |
| StripePriceIds | List of texts (text + check “multiple entries”) |
| StripeSessionId | text |
| ⚠️ You must create all the fields or the integration won’t work |
|---|
Enable the Data API
Go to Settings -> API
- Enable Data API
- Check StripeCheckouts (this gives us access to the user data fields that you allow in the next step)
- Use field display instead of ID for key names
⚠️ Be sure to check Use field display instead of ID for key names |
|---|
Add data fields
In your Bubble App go to Data -> Data types -> User
Create the following new fields on the User data type:
Create an API Token
Now go to Settings -> API -> Generate new API token. Copy the API token
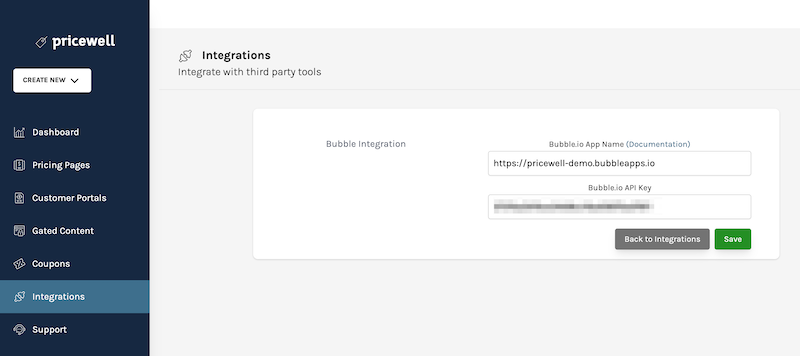
Go to PriceWell.io, login and click Integrations -> Bubble Integration.
Paste the API token into the Bubble API Token field. Then enter you Bubble App URL and click Save. You bubble app name will look something like this https://YOUR_APP.bubbleapps.io and check
“Integration Type:” Checkout

If the integration fails to save, double check your API token and app url.
✨ Stripe checkout data will appear in Bubble automatically ✨
| ⚠️ Changes in your Stripe Test Mode will go to /version-test in Bubble. Live Stripe subscriptions will go to you live Bubble app |
|---|
How to enable a feature when a product is purchased
Now you have checkout data syncing to your Bubble database, you can use this data to enable features in your app. To do this:
- Create a new workflow on the page that has the feature you want to restrict access to
- Add a new event “Page is loaded”
- Only when “Current User is logged in and " -> Search for Data
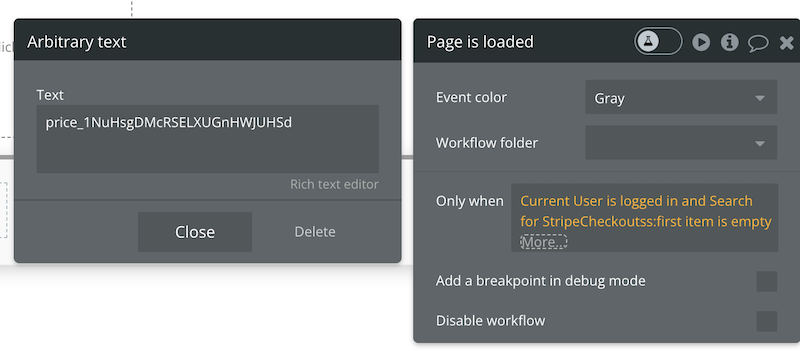
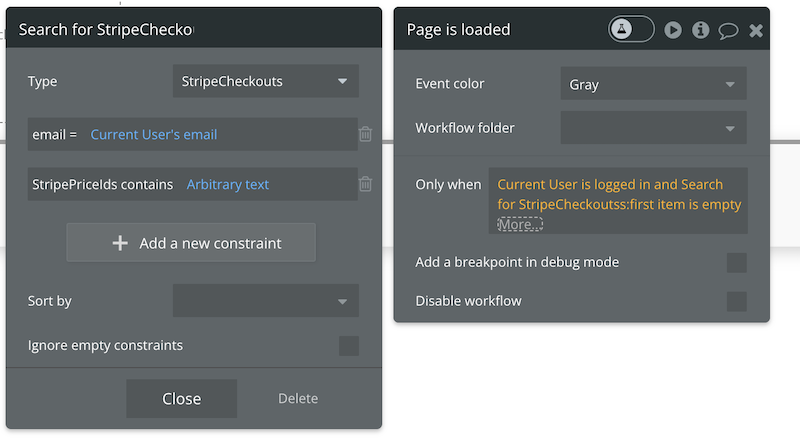
- Search for StripeCheckouts where email = Current User’s email and StripePriceIds contains your Stripe products price id (example: “price_123”)

- Only when “Current User is logged in and Search for StripeCheckoutss:first item is empty”
- Add a new action “Navigate to page” and send the user to the checkout page
The full workflow should look like this:

Alternatively you can keep the user on the same page and simply hide/show the element if they have purchased the product.